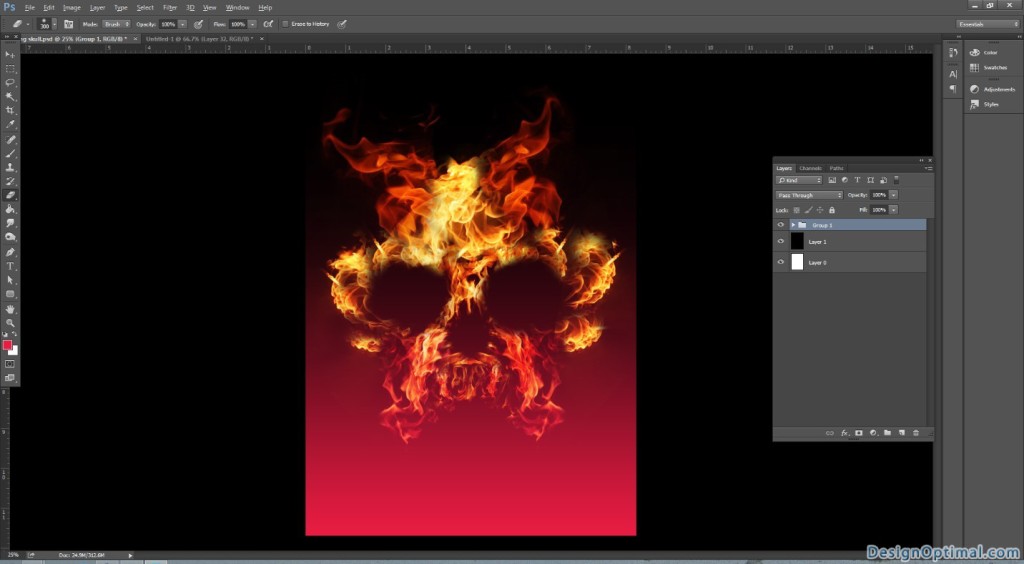
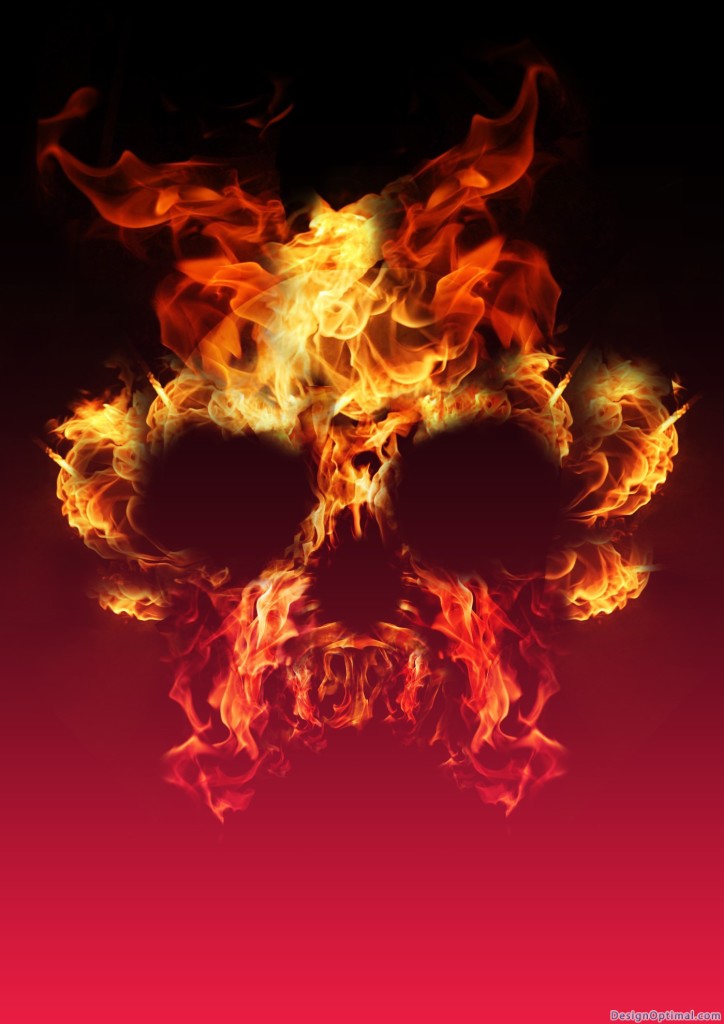
Hello!! Thanks for join with us again, today we will show you how to create a logo like if the whole logo is made out of ignite flames.
If you have been following our tutorials then you can find out that we did a carbon fiber text effect using some textures and some effects in Ps at the last tutorial.
In this tutorial we will look to create a logo but this time it will be like if it’s make out of flames or if the logo had been ignite in to fire. These kind of effects are mainly used in Advertising and same we can use these if we export the layer properly, we can even animate the logo with some simple animation software.
Resources (all credits goes to original authors)
- Images used :
Step 01
- Open Adobe Photoshop and create a new document.
- The document size will be A4 and it will be portrait in position and save it as flaming Skull logo.
- Fill the background with black color.
Step 02
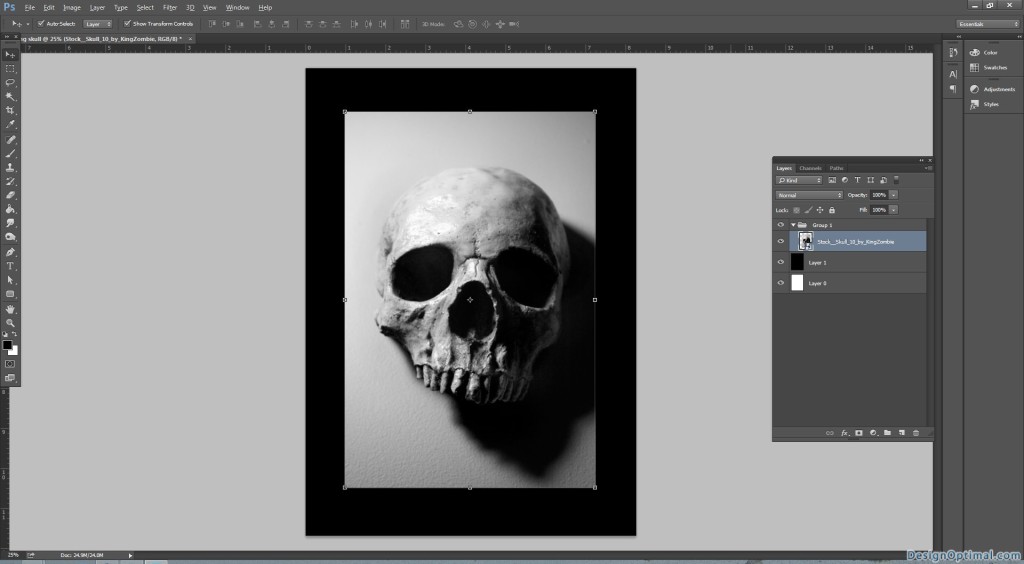
- Select the skull image (check the resources section) and place it in the Ps Document and center it.
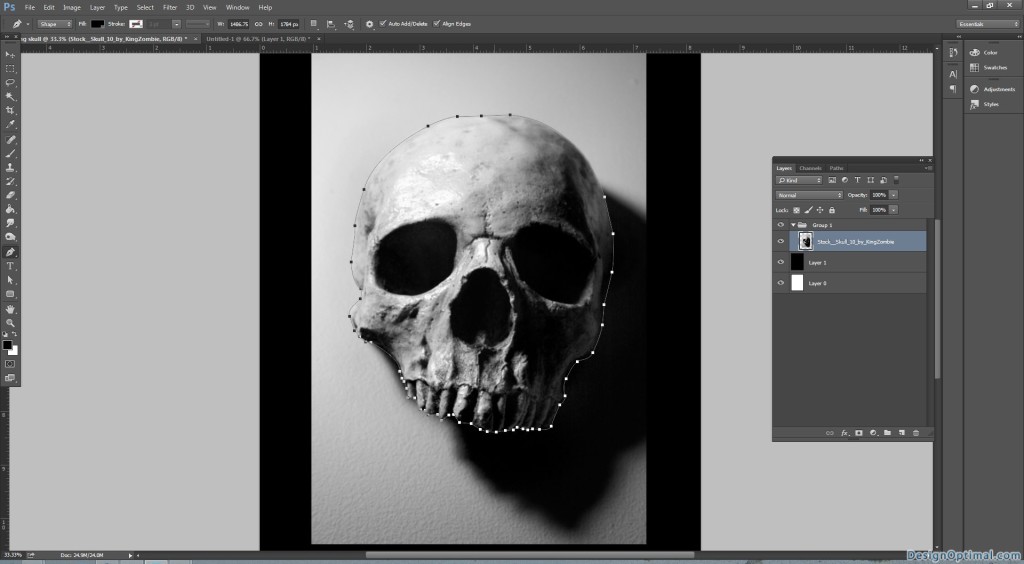
- Remove the background of the skull image using the pen tool.
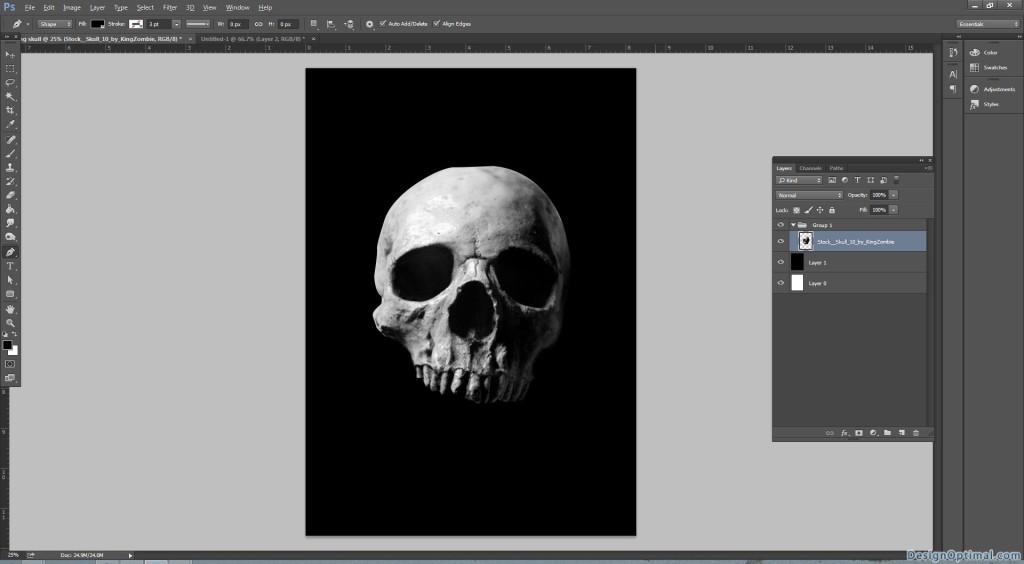
- Now we are going to start using the flame images that we have mentioned in the resources section.
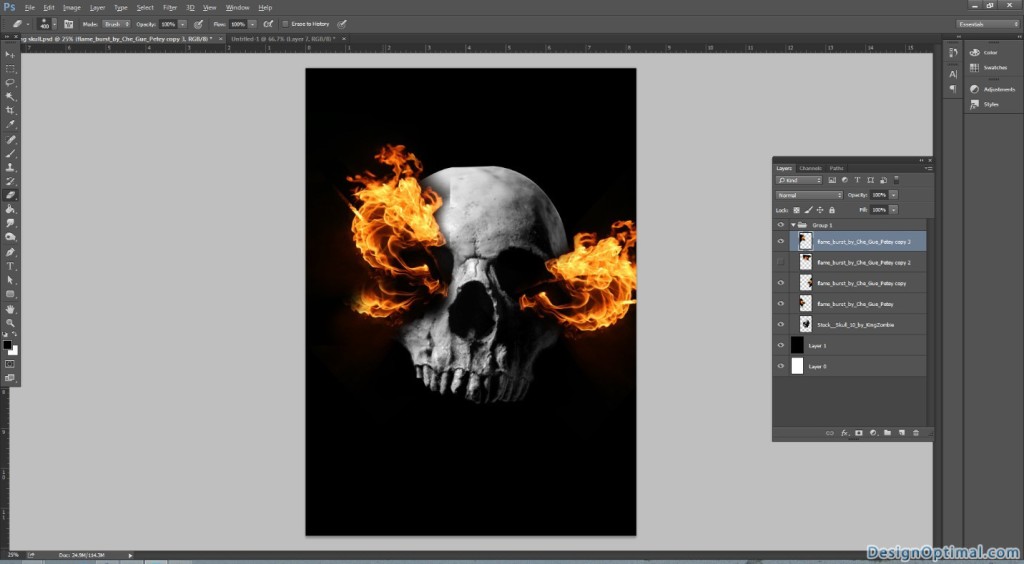
- First use flame_burst_by_Che_Gue_Petey image and place it as shown below.
- Now duplicate the same and flip it horizontally.
- Take the eraser tool and erase off the black parts of the image that covers the skull.
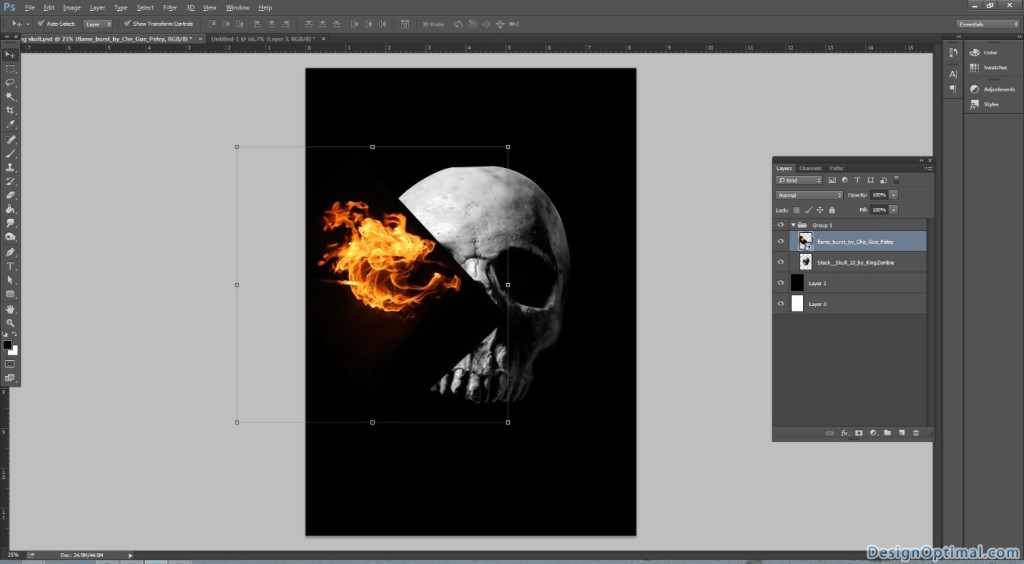
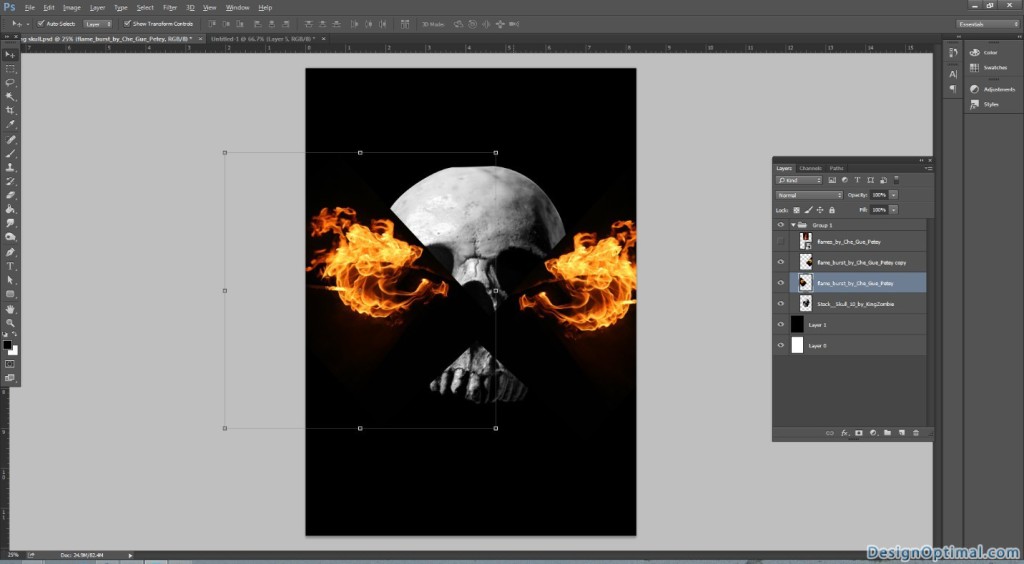
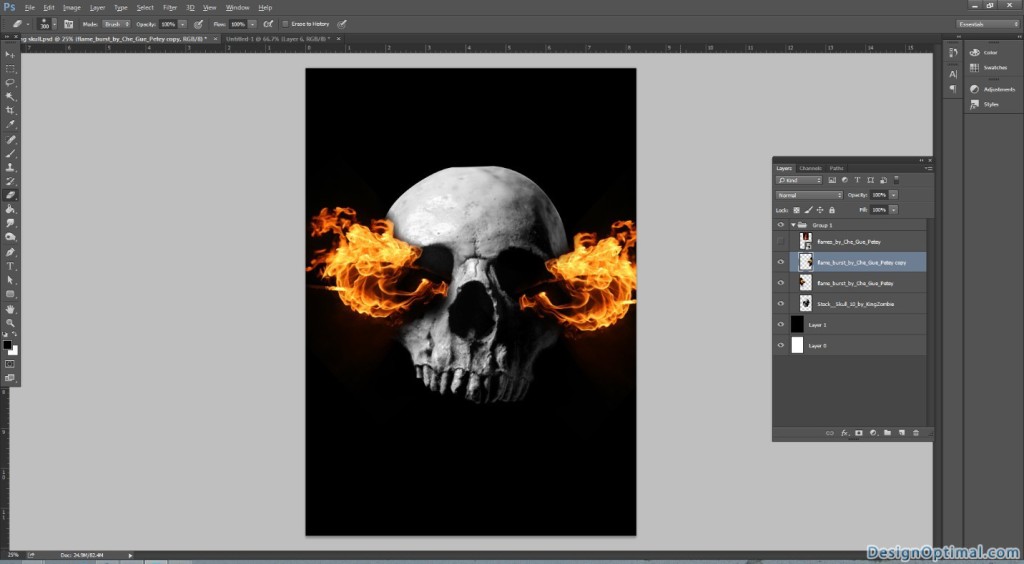
Step 03
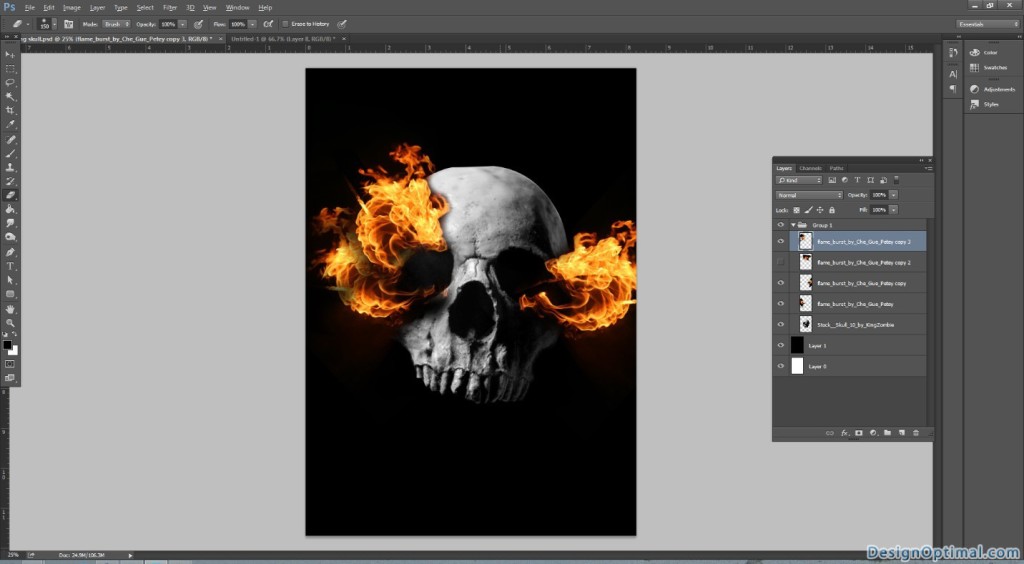
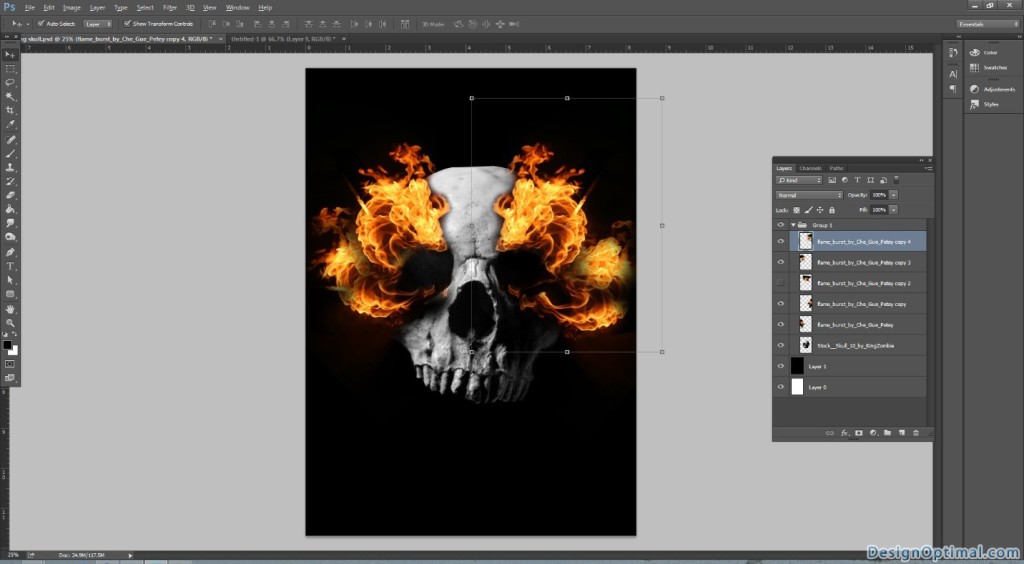
- Again duplicate the same flame image and place it as shown below images.
- We are trying to make the eyes of the skull using the flame image.
- We will be erasing off some parts in order to make the skull shape look more prominent in this process.
- The process is shown below, follow it. If you think any other flame images can be used in this process then feel free to use them. But make sure to get the skull shape prominent every time.
Step 04
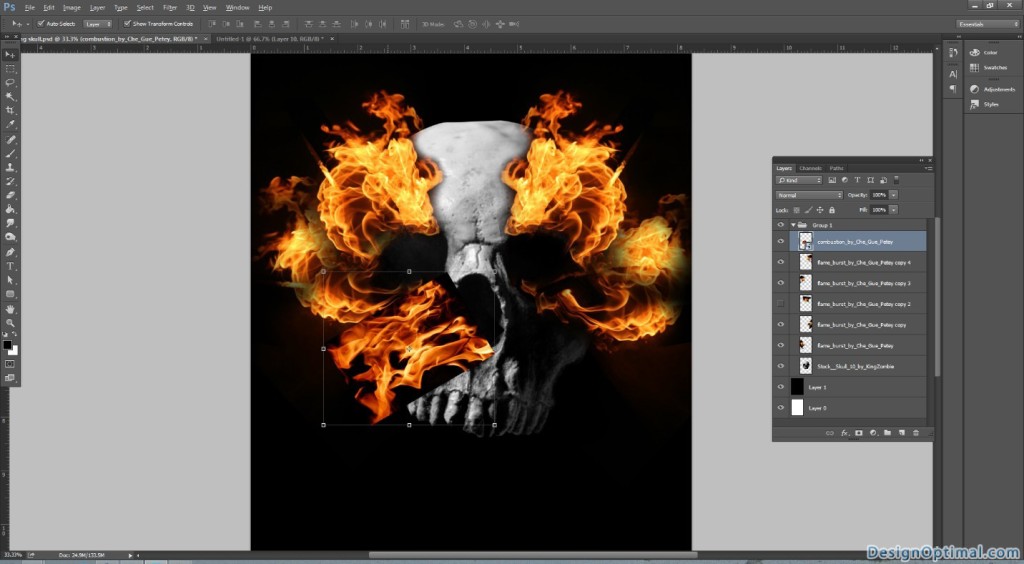
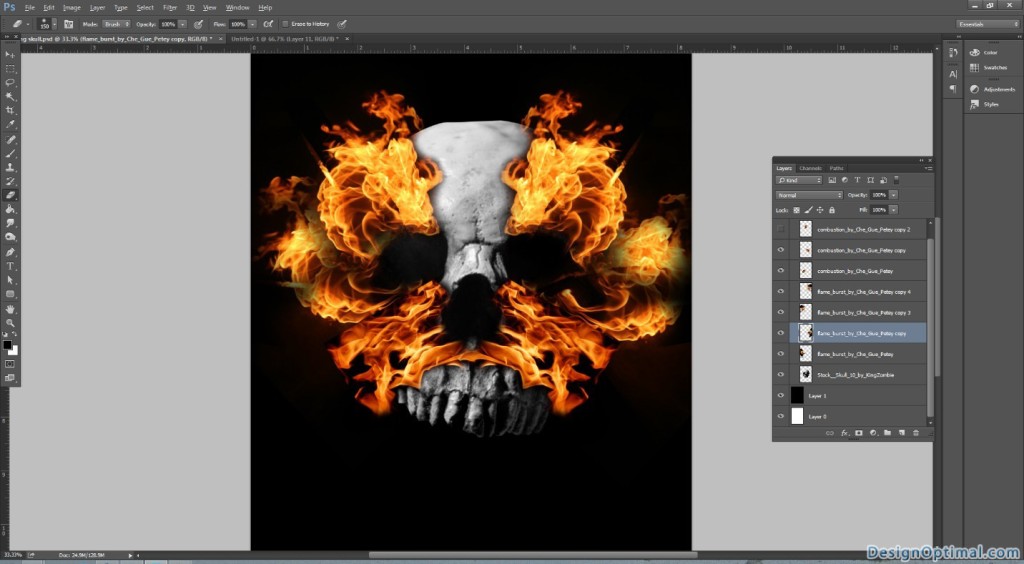
- We are done with the eyes area now we will work on nose & cheeks.
- Use the combustion_by_Che_Gue_Petey image and place them till the nose are and checks area get prominent.
- We will have to erase off some parts as the previous image.
- The process is shown below.
Step 05
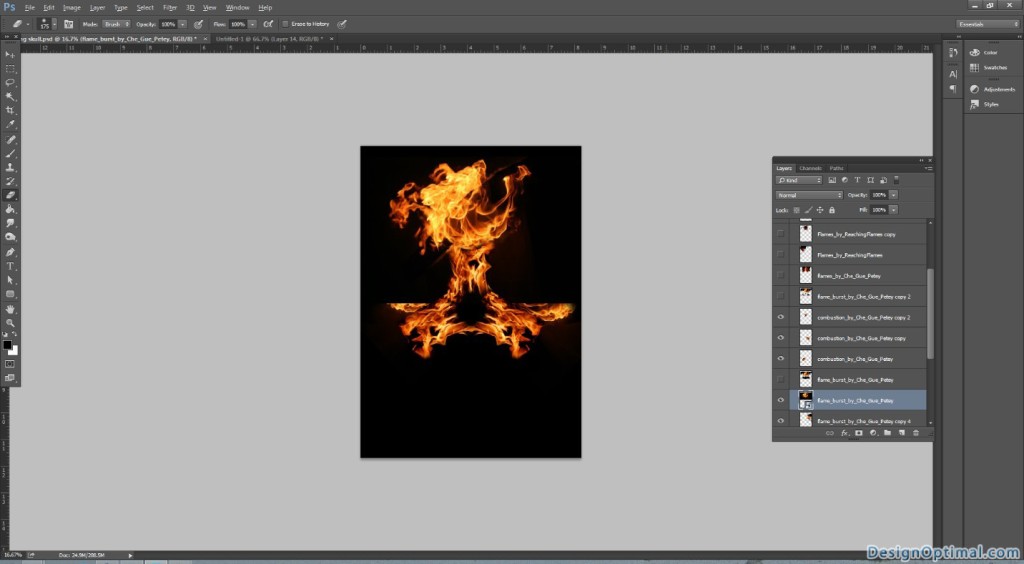
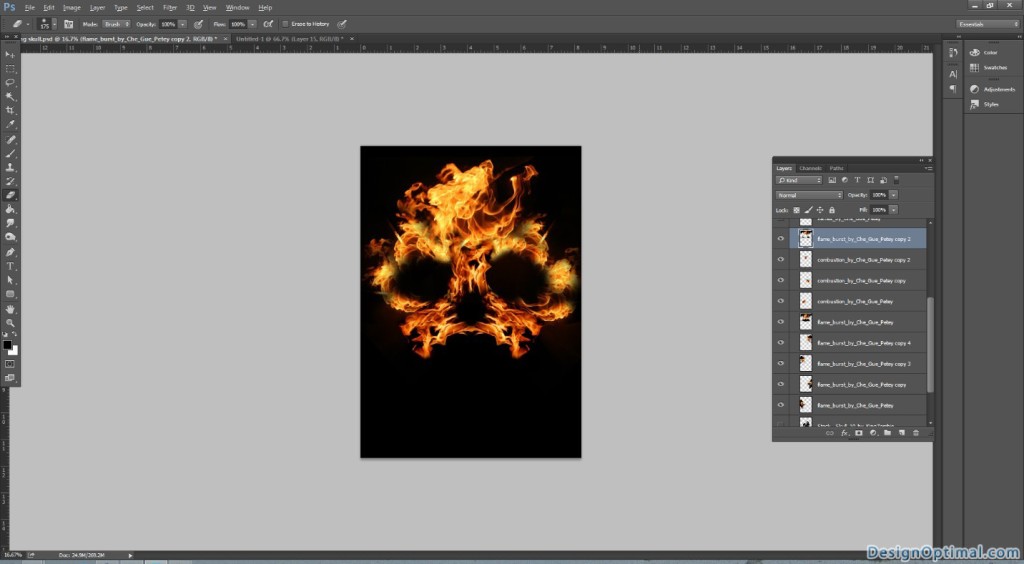
- Now we will work around the forehead and the head are of the skull. For this we will use the image named flame_burst_by_Che_Gue_Petey.
- Place the flame image as shown below. Erase off the unwanted areas as earlier.
Step 06
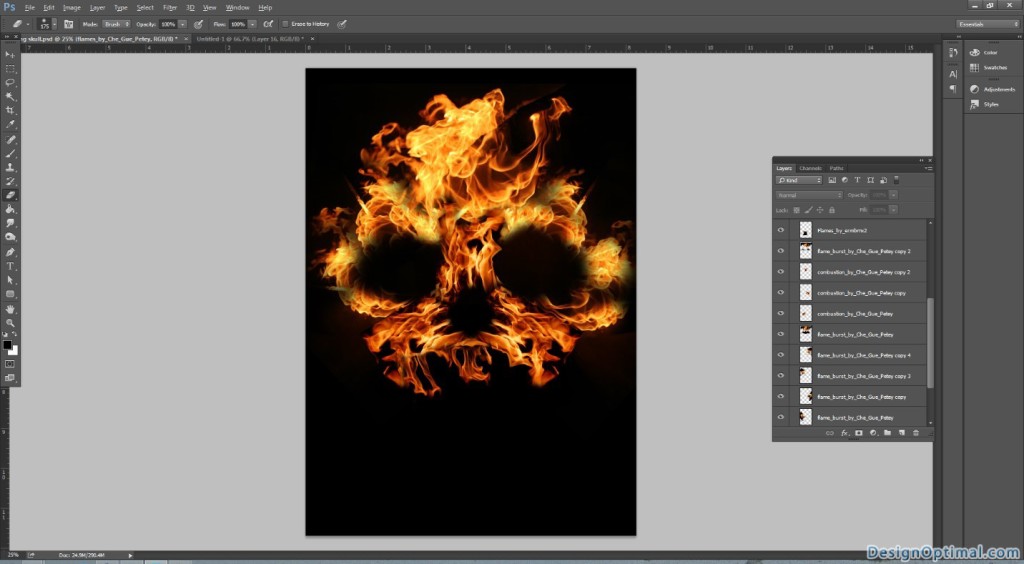
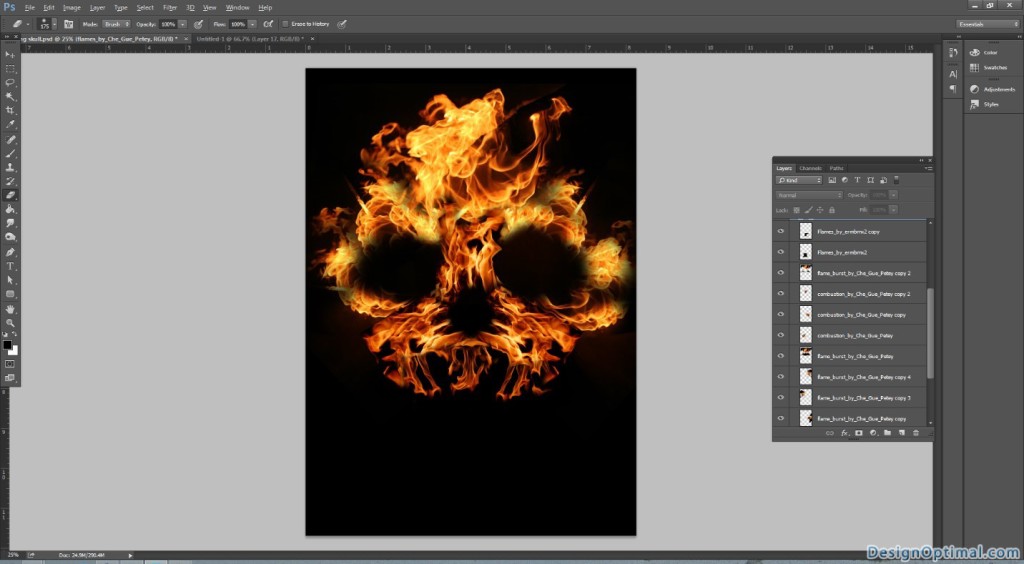
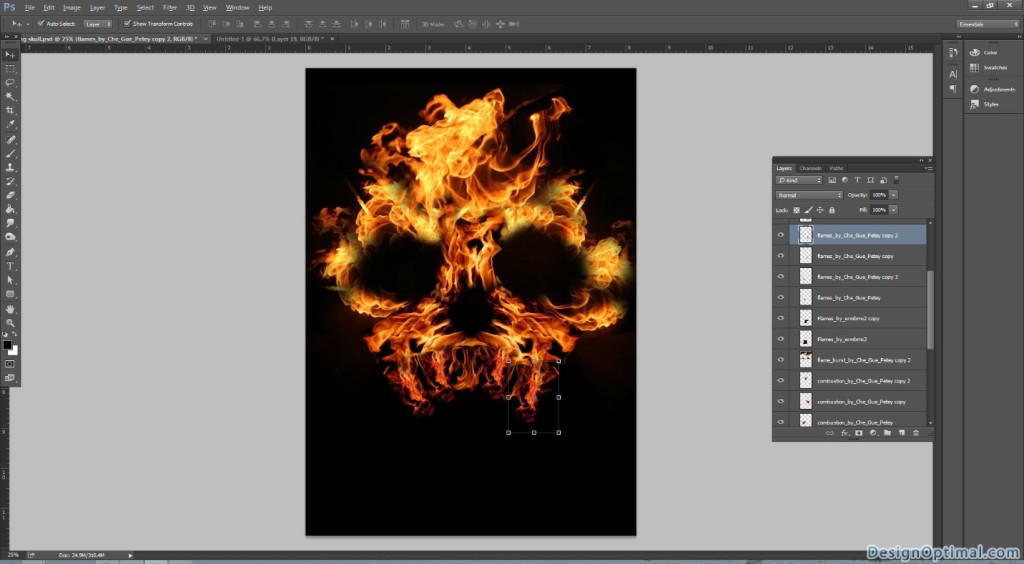
- Next step will be to add teeth area to the skull using the flames.
- For this we will use Flames_by_ermbmx2 & flames_by_Che_Gue_Petey images.
- The process is shown below. Make sure to emphasize the teeth are by using the correct flame shape.
Step 07
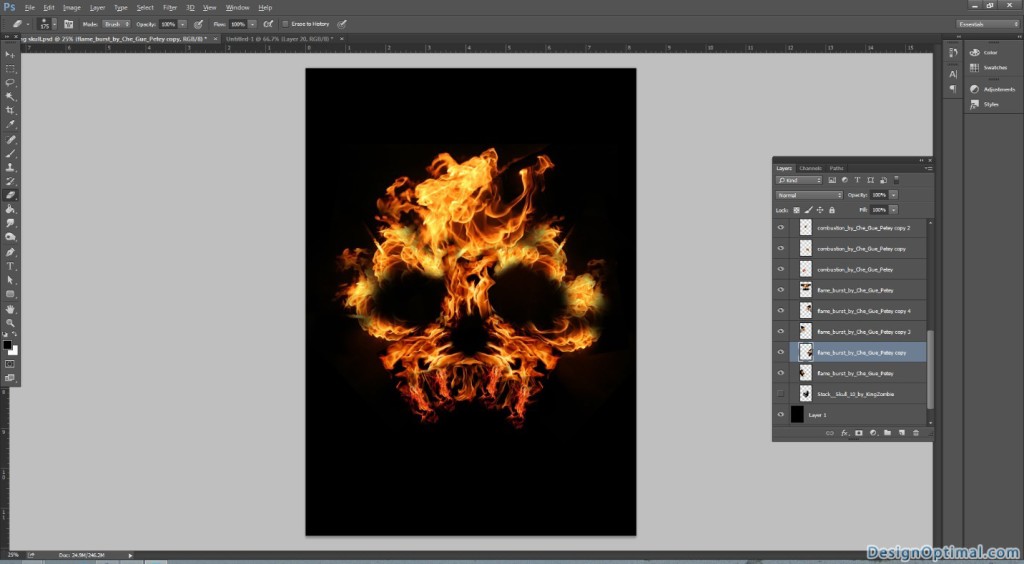
- Now select all the layers that we made so for and resize them.
- Center it to the document.
- This will help us to add more details to the art work around the head areas.
Step 08
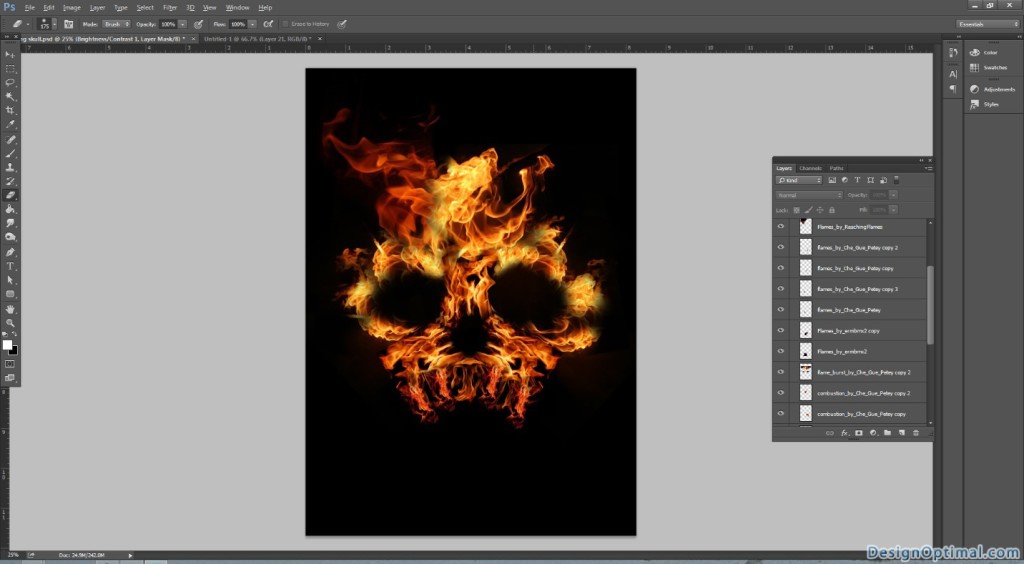
- Now we will use Flames_by_ReachingFlames and place it as shown below.
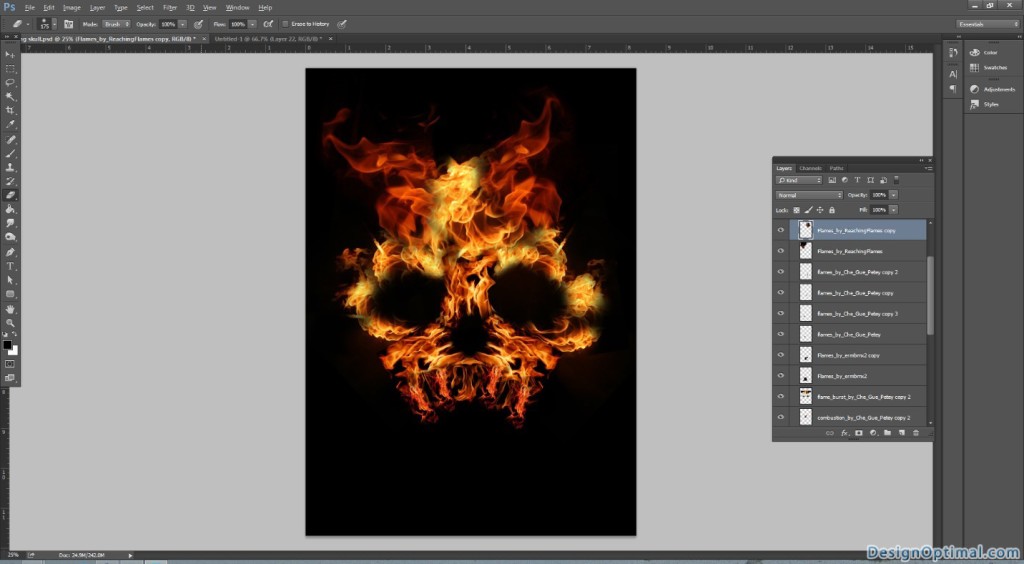
Step 09
- We will add some more details to the cheek area by using the image called flames_by_Che_Gue_Petey. Place them as shown below.
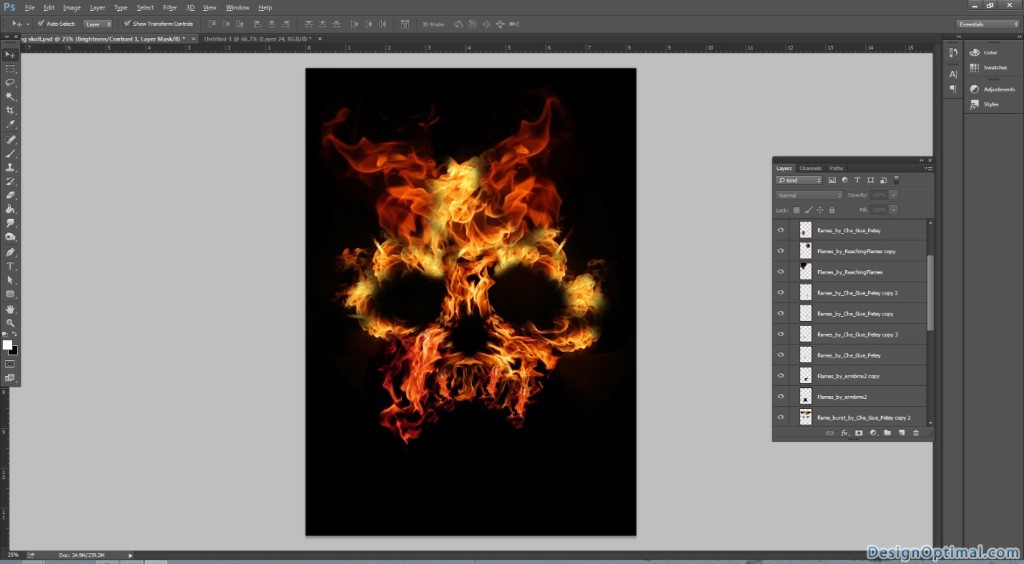
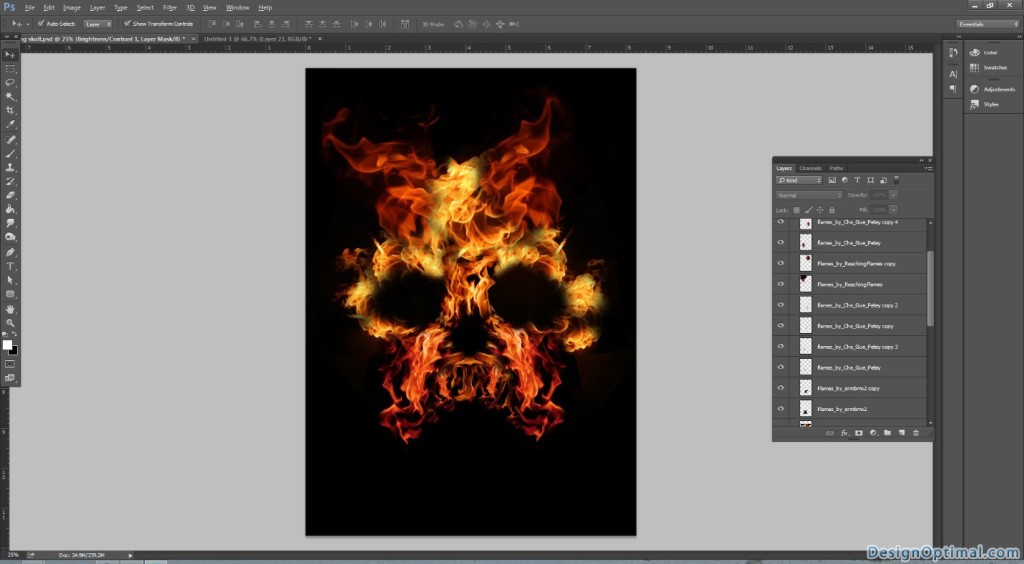
Step 10
- Now for the final steps, we will add some more detail to the eyes area like the place where eye ball should be look like a hollow.
- For that use black as the color and take a blur brush and start adding black patch to each of the eye ball area.
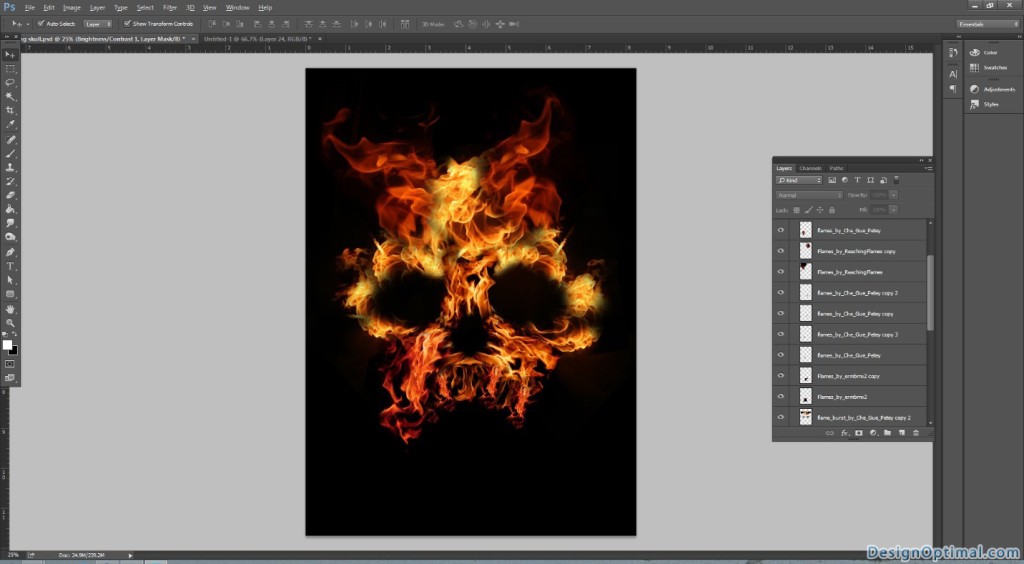
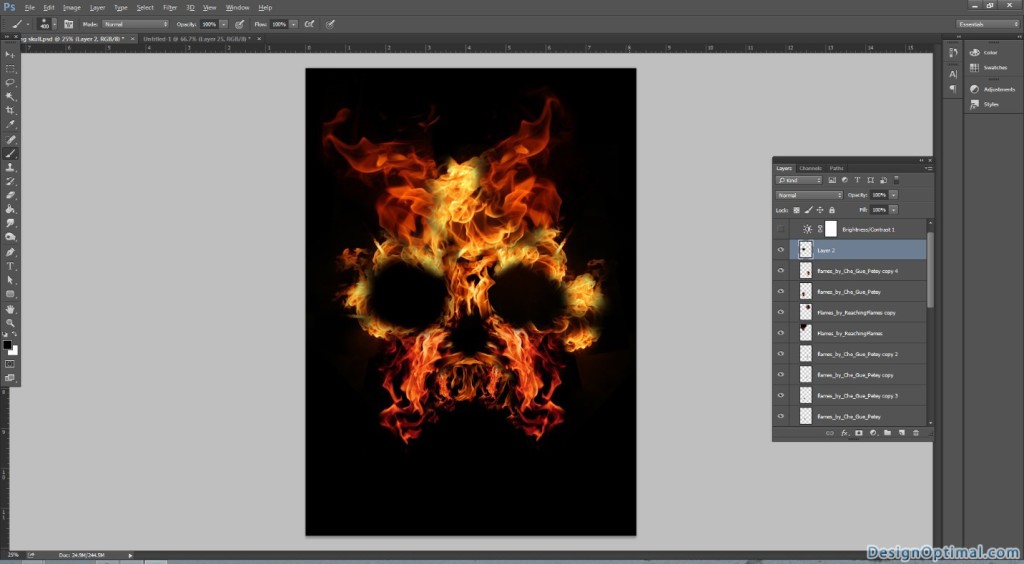
Step 11
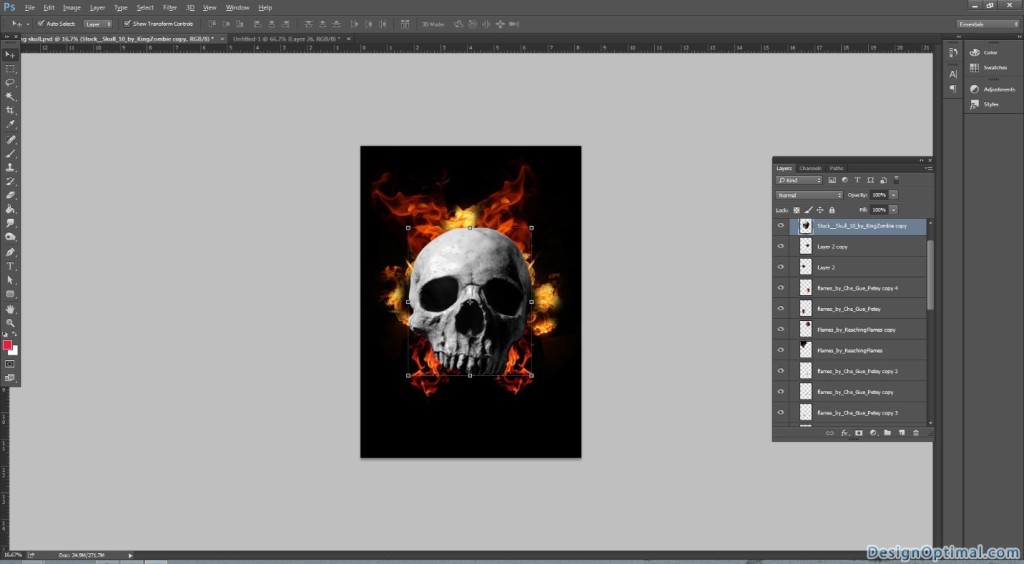
- Finally we will duplicate the original skull and keep it on the top of the all the flames layers.
- Now resize it and blend it to soft light.
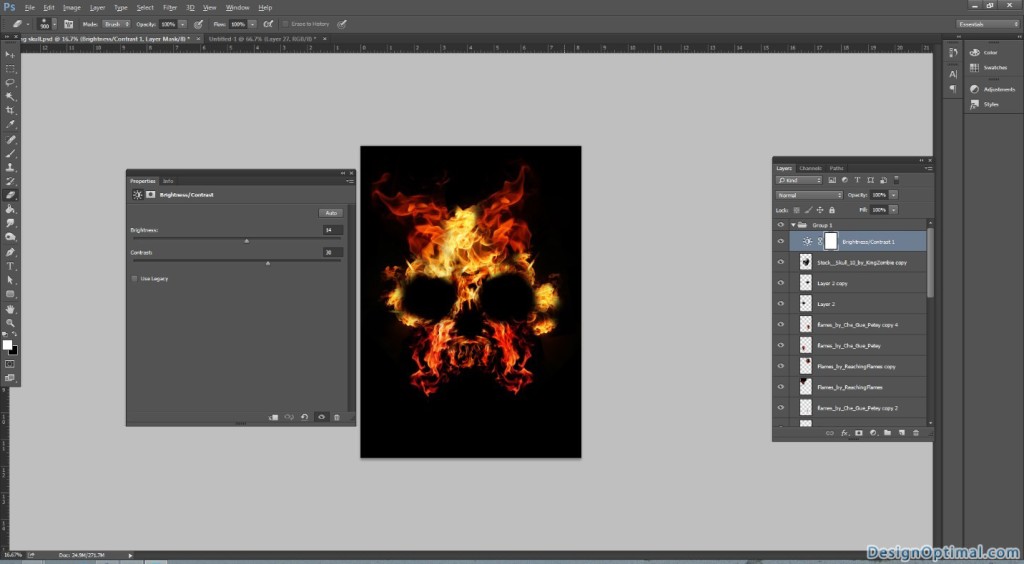
- Add some layer adjustment of brightness/contrast to make it more attractive.
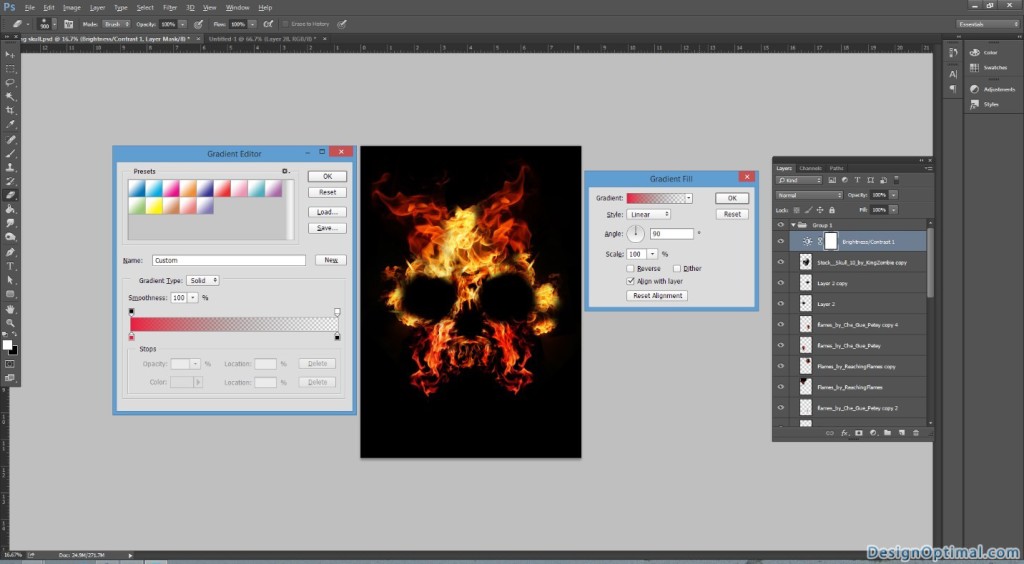
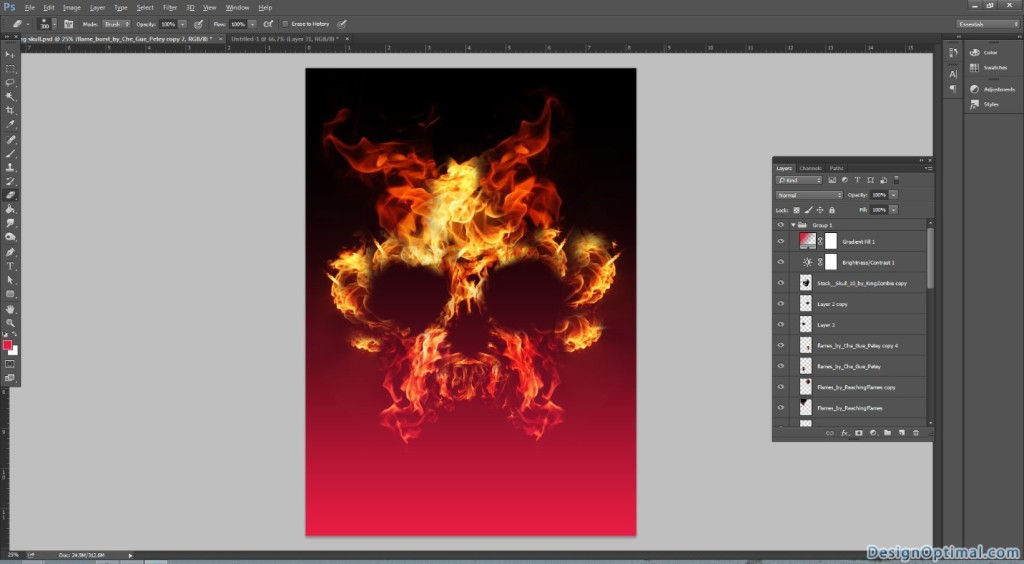
- Finally add a grading map layer with black and red as shown and Blend it in to screen.
- The final output will be as shown below.
